
Start with the comparison
One small fix. Two very different outcomes.
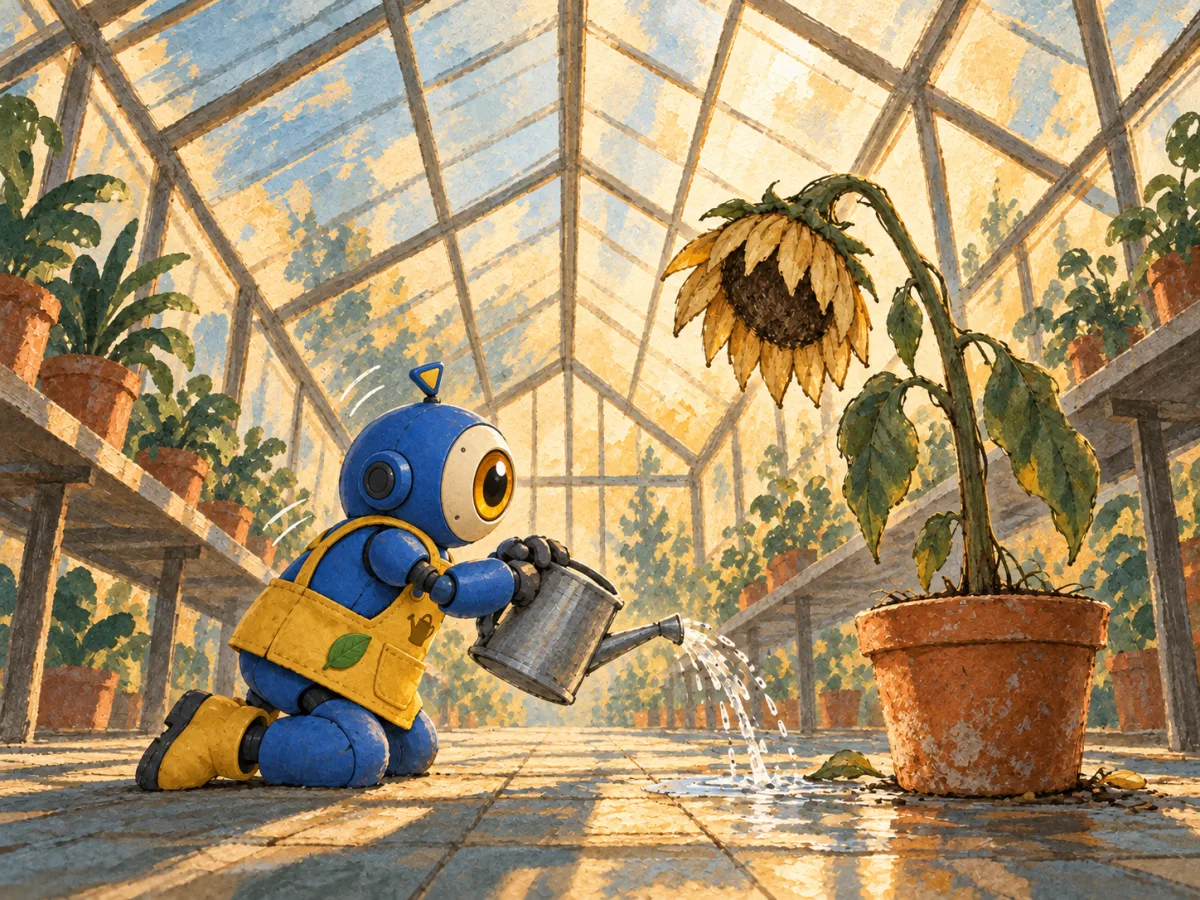
Sprig is a fictional garden robot built for this guide—no private portrait or personal identity is hiding underneath. In the starting image, Sprig is trying to save a wilted sunflower, but the water misses the pot.
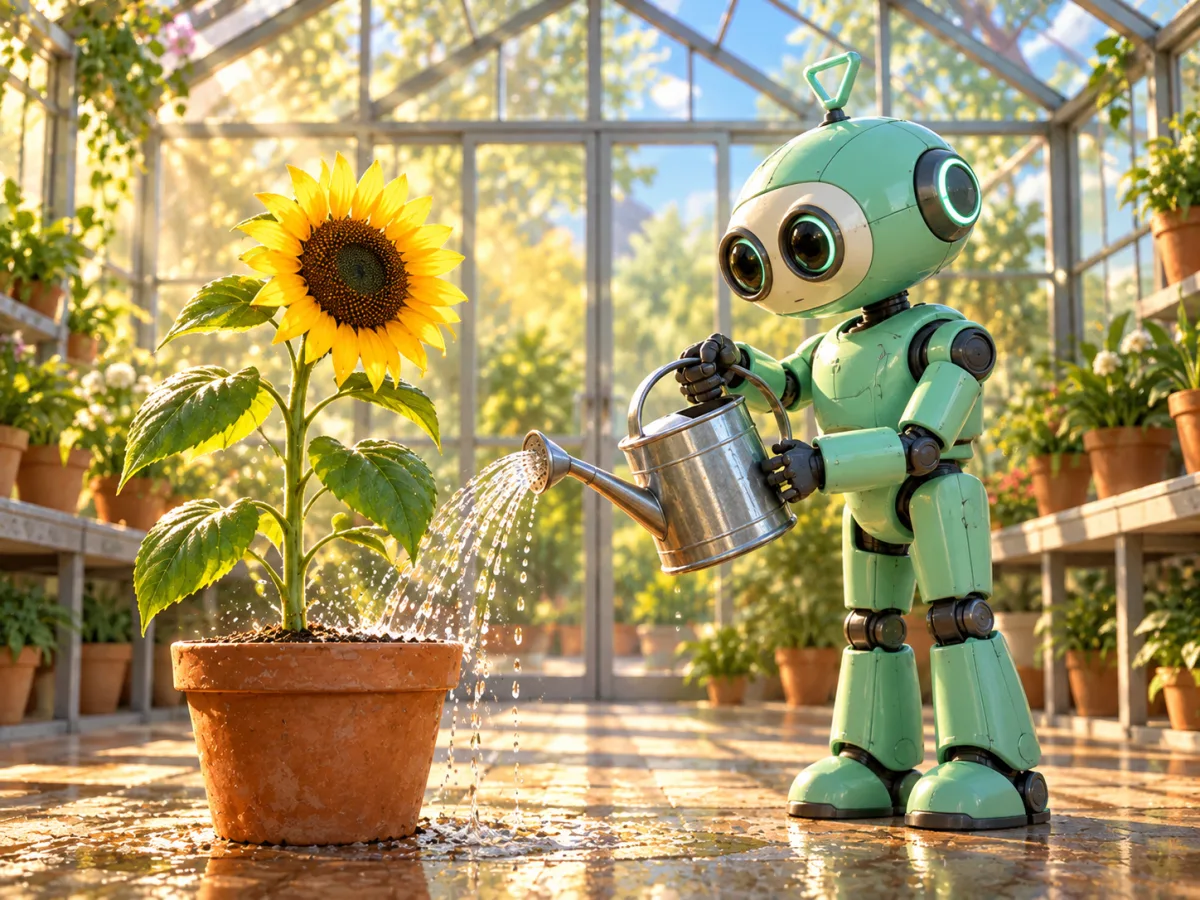
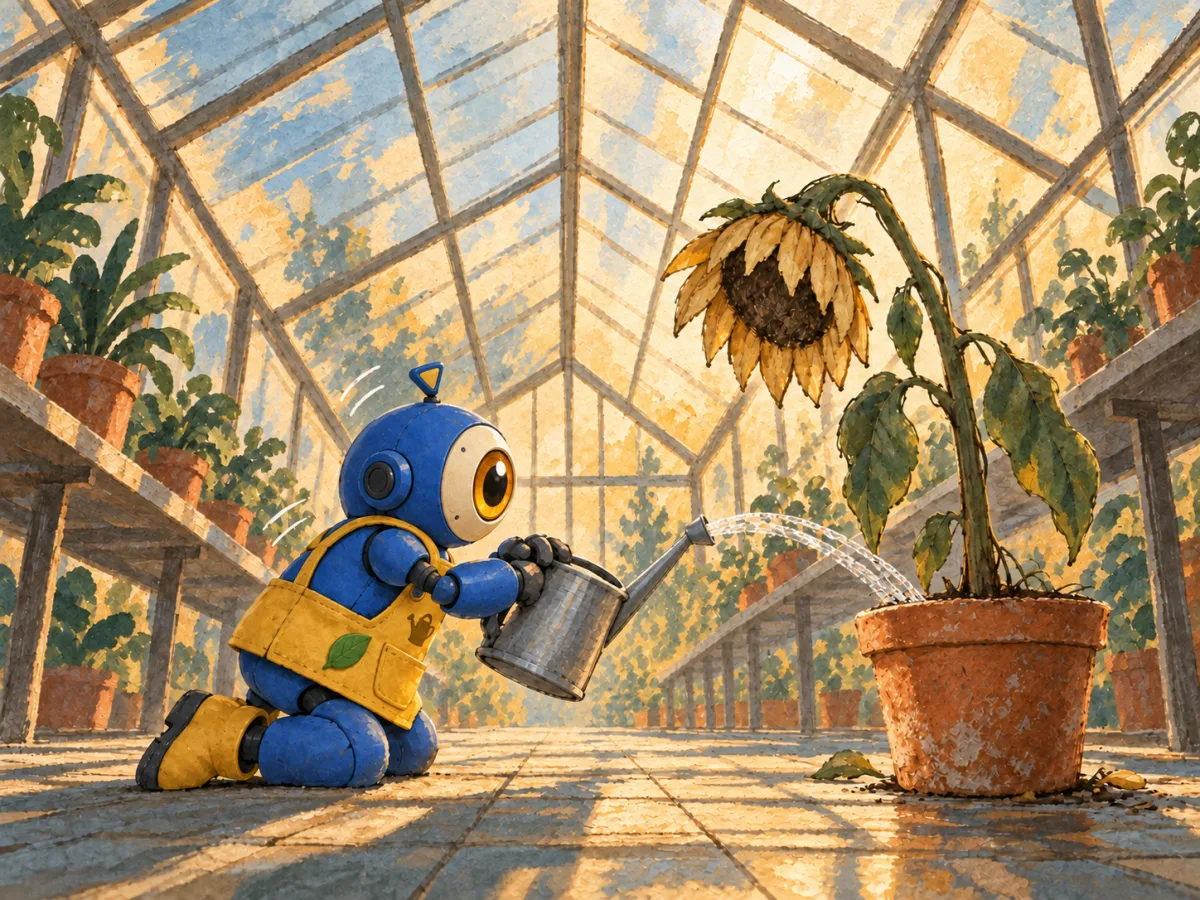
A roller-coaster workflow asks for a better picture and hopes. It gets a healthy flower, plus a different robot, pose, camera, mood, and medium. A ratchet workflow moves the water and leaves the picture alone.
Starting point
Roller-coaster rewrite
Ratchet repair
Before the mechanics
The picture needs an opinion.
A lot of generated imagery is competent and dead. It has lighting, detail, and no reason to exist. Before I generate, I want to know who owns the image, what just happened, what each character wants, and where the eye should land first.
Those decisions turn a render into a moment. A hand has to grip the prop instead of hovering near it. Two characters need distinct reactions instead of the same pleasant expression. The background needs to support the beat instead of becoming an expensive screensaver. Style words cannot do that work for you.
The ratchet
Keep the wins. Move one thing.
Save the version you like best
Call it the current best and keep it where you can see it. Newer does not mean better, and a new image should never quietly replace the last one that worked.
In this demo: The first Sprig image is the current best. The missed water is annoying, but the picture already has a clear character, action, camera, and mood.
Sample prompt
This is my current best. Do not generate or edit anything yet. Treat this image as the version to beat, and confirm which image you are using as the baseline.Write a short keep-list
Name three to six things you would be upset to lose. Use plain, visible facts: the blue one-eyed robot, kneeling on the left, the drooping flower on the right, the low camera, and the paper-and-paint finish.
In this demo: A keep-list turns “I liked the old one more” into a comparison you can actually make.
Sample prompt
Before editing, write a keep-list of three to six visible things that already work. For this image, protect Sprig’s blue one-eyed design, the kneeling pose on the left, the drooping flower on the right, the low camera, and the paper-and-paint finish.Ask for one change you can point to
“Make it better” gives the model permission to remake the whole picture. A useful instruction names one visible result and leaves the rest alone.
In this demo: For Sprig: “Make the water land inside the pot. Keep everything else the same.” We can tell whether that happened without debating taste.
Sample prompt
Change only the water stream so it lands inside the flowerpot. Remove the splash where it hit the floor. Keep every item on the keep-list unchanged.Give every reference one job
Do not toss several images into the prompt and call them inspiration. Say what each one controls: the composition decides where things go, each model sheet decides who a character is, and one shared style reference decides how everybody is drawn.
In this demo: If each model sheet also brings its own line weight, anatomy, and shading into a group scene, the characters can look as if they came from different shows. Give identity and rendering separate jobs.
Sample prompt
Use Reference 1 only for the camera, layout, and pose. Use each character model sheet only for that character’s identity and proportions. Use the final reference for the shared line weight, anatomy treatment, shading, palette, and light. Render every character as if they belong in the same production.Put the two versions side by side
First check the change you asked for. Then walk down the keep-list. Looking at only the new image makes drift easy to miss because the new version may still be attractive.
In this demo: The glossy green-robot version fixes the water. Side by side, it also reveals five stolen wins: character, pose, flower, camera, and medium.
Sample prompt
Compare the new image with the current best. First say whether the requested change worked. Then check every keep-list item. Report three short lists: Improved, Preserved, and Drifted. Do not judge the new image by itself.Keep the new one only if it really wins
The new image becomes your current best only when the requested change improved and the keep-list still holds. If it fixed one thing by breaking three others, keep the old image and try again.
In this demo: The localized Sprig repair wins because the water moves into the pot while the rest of the picture remains recognizably the same.
Sample prompt
Give this version one verdict: KEEP, REVISE, or DISCARD. Choose KEEP only if the requested change improved and every keep-list item survived. If you choose REVISE, name the single next repair. If you choose DISCARD, keep the old current best.
Continuity before composition
How did I get all these styles to clash? Here’s how.
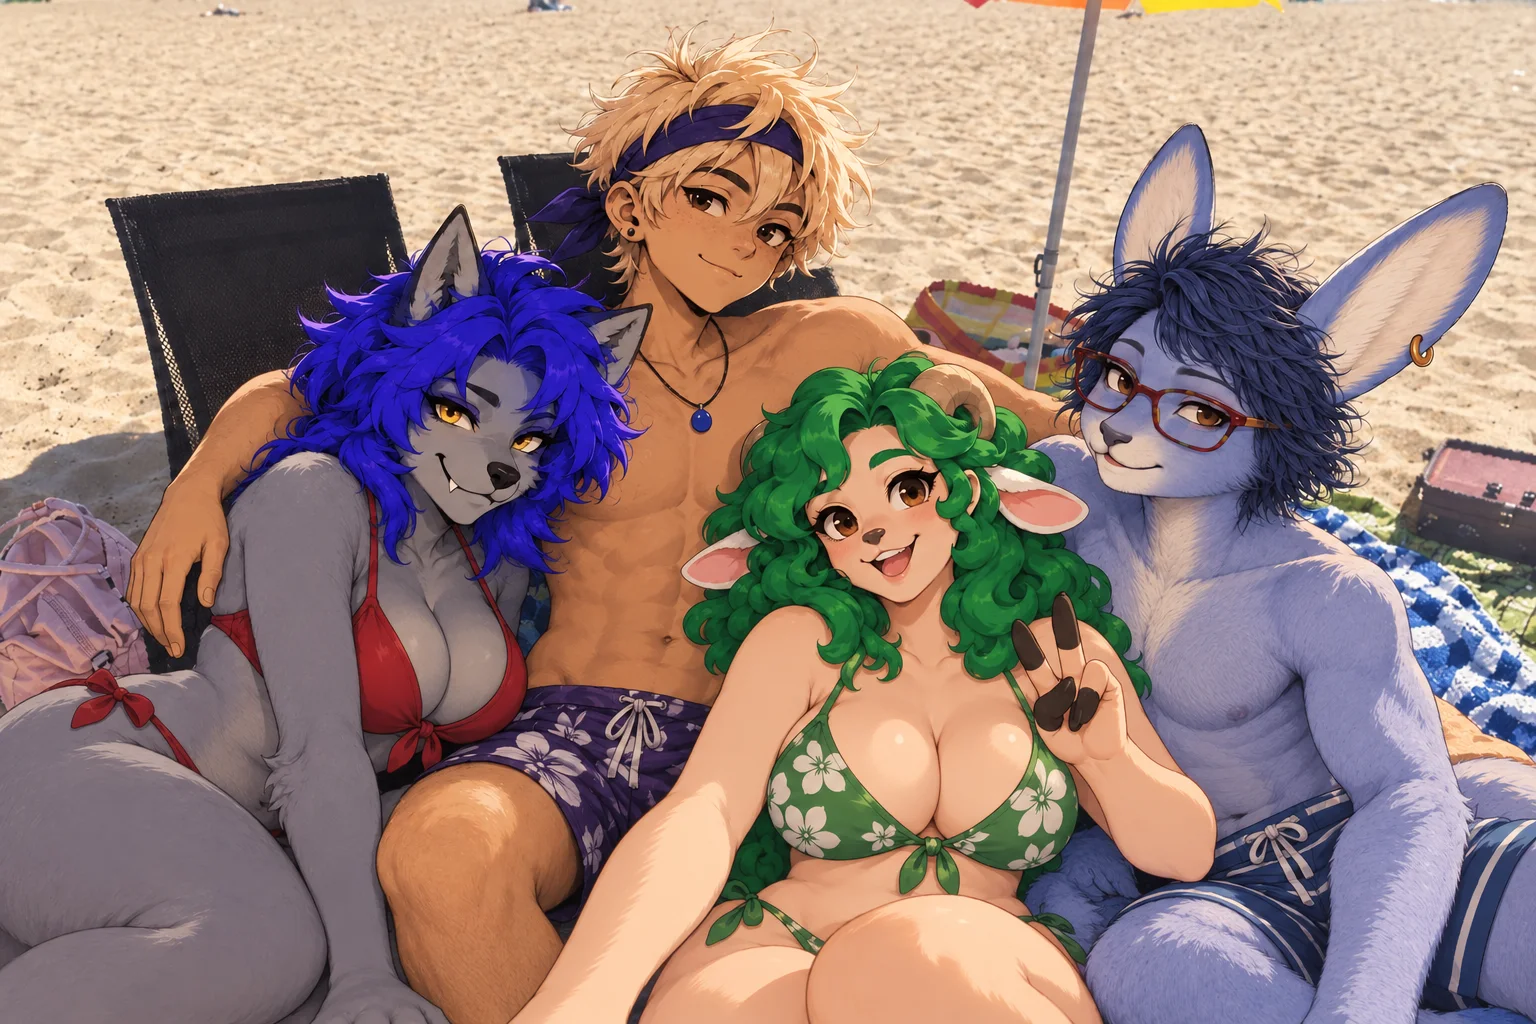
I brought four recognizable characters into one beach picture, but their references were built in different visual languages. One has softer face geometry. Another has sharper anime features. Fur, hands, eyes, line weight, and shading all follow slightly different rules. Each character reads. The group does not quite agree with itself.
Useful failure: identity survived, style did not
First, build identity on purpose.
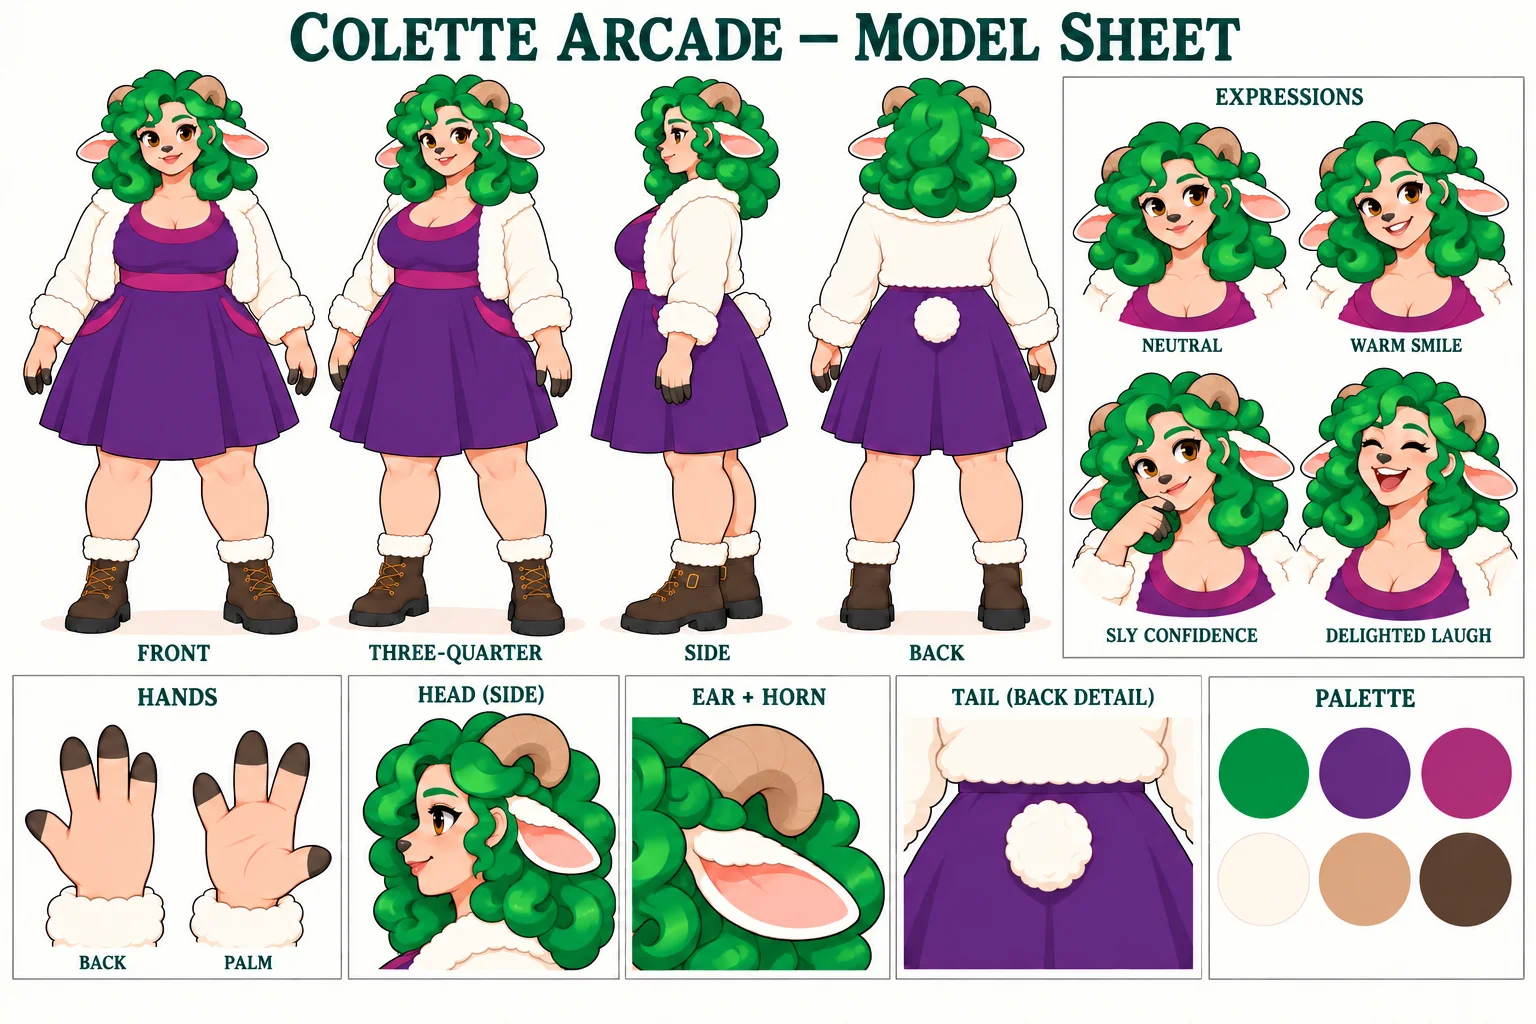
A good model sheet is more than one attractive portrait pasted four times. Turn the character around. Test a neutral face and several expressions. Pull out the details most likely to drift: ears, horns, nose, hands, tail, hair shape, markings, jewelry, and palette. Label the traits that must survive every pose.
The sheet’s job is continuity. It should answer “Is this still the same character?” before a dramatic camera, outfit, or lighting setup makes that question harder.
Sample model-sheet prompt
Build a clean model sheet for [character]. This sheet owns identity, not the final scene style.

Show front, three-quarter, side, and back views at the same scale; four useful expressions; and close-ups of [ears / horns / hands / tail / markings / signature accessory]. Keep the character’s proportions, face geometry, hair silhouette, palette, and markings identical in every view. Use a plain background and even light. Do not add a story scene.
Then, make the group share one visual world.
Use each model sheet for identity only. Choose one separate style reference to control the rules everybody shares: line weight, face simplification, anatomy, fur detail, shading, palette, and lighting. A composition reference can still decide the camera and where bodies overlap.
This separation matters. If every model sheet is allowed to control style as well as identity, the final picture averages incompatible instructions instead of making a cast.
Sample group-photo prompt
Stage one group portrait using the composition reference for camera, pose, scale, and overlap.

Use each model sheet only for that character’s identity: face, body proportions, hair, ears, horns, tail, markings, and signature accessories. Use the shared style reference for every character’s line weight, anatomy simplification, eye treatment, fur detail, shading, palette, and light. One scene, one camera, one light source, one production style. Do not copy the individual model sheets’ rendering styles.
For adding a new character to a photographic scene, my current working default is human-first: choose the pose, insert a human stand-in, check scale and floor contact, convert only that person, then compare the result with both the human checkpoint and the original backplate. It costs an extra pass and it can still drift. It is a useful default from our experiments, not a universal law. I am not reproducing that backplate here because the preserved photograph contains real bystanders.
Three kinds of right
The represented person owns the last test.
Code can check whether I defined the character well enough to test. A model can compare the result with the references and flag a missing tail, warped glasses, or a room that changed. Neither can decide whether the person in the picture recognizes themself.
That matters in Bunch, where a portrait can be a recognition surface rather than decoration. A technically accurate picture can still feel like nobody. The human judgment is not an embarrassing gap in the eval. It is the acceptance test the other checks are there to support.
Keep the labels simple
A draft is not a final.
Generated means the tool made something. Saved means you kept the file. Chosen means you picked it. Approved means the person or client who matters said yes. Those are four different moments.
If the right reference is missing, stop and ask for it. If nobody has approved the image, call it a draft. A polished picture can still be the wrong picture.
The whole move, end to end
How we made Colette together.
Colette did not begin as a giant style prompt. We chose one identity anchor at a time: shoulder-length green curls; feminine and borderline sultry; adult, softly full-bodied lamb proportions. Then we made the design testable: lamb ears, curled horns, lamb nose, violet dress, white shearling jacket, turquoise pendant, tail, and toon-four hands.
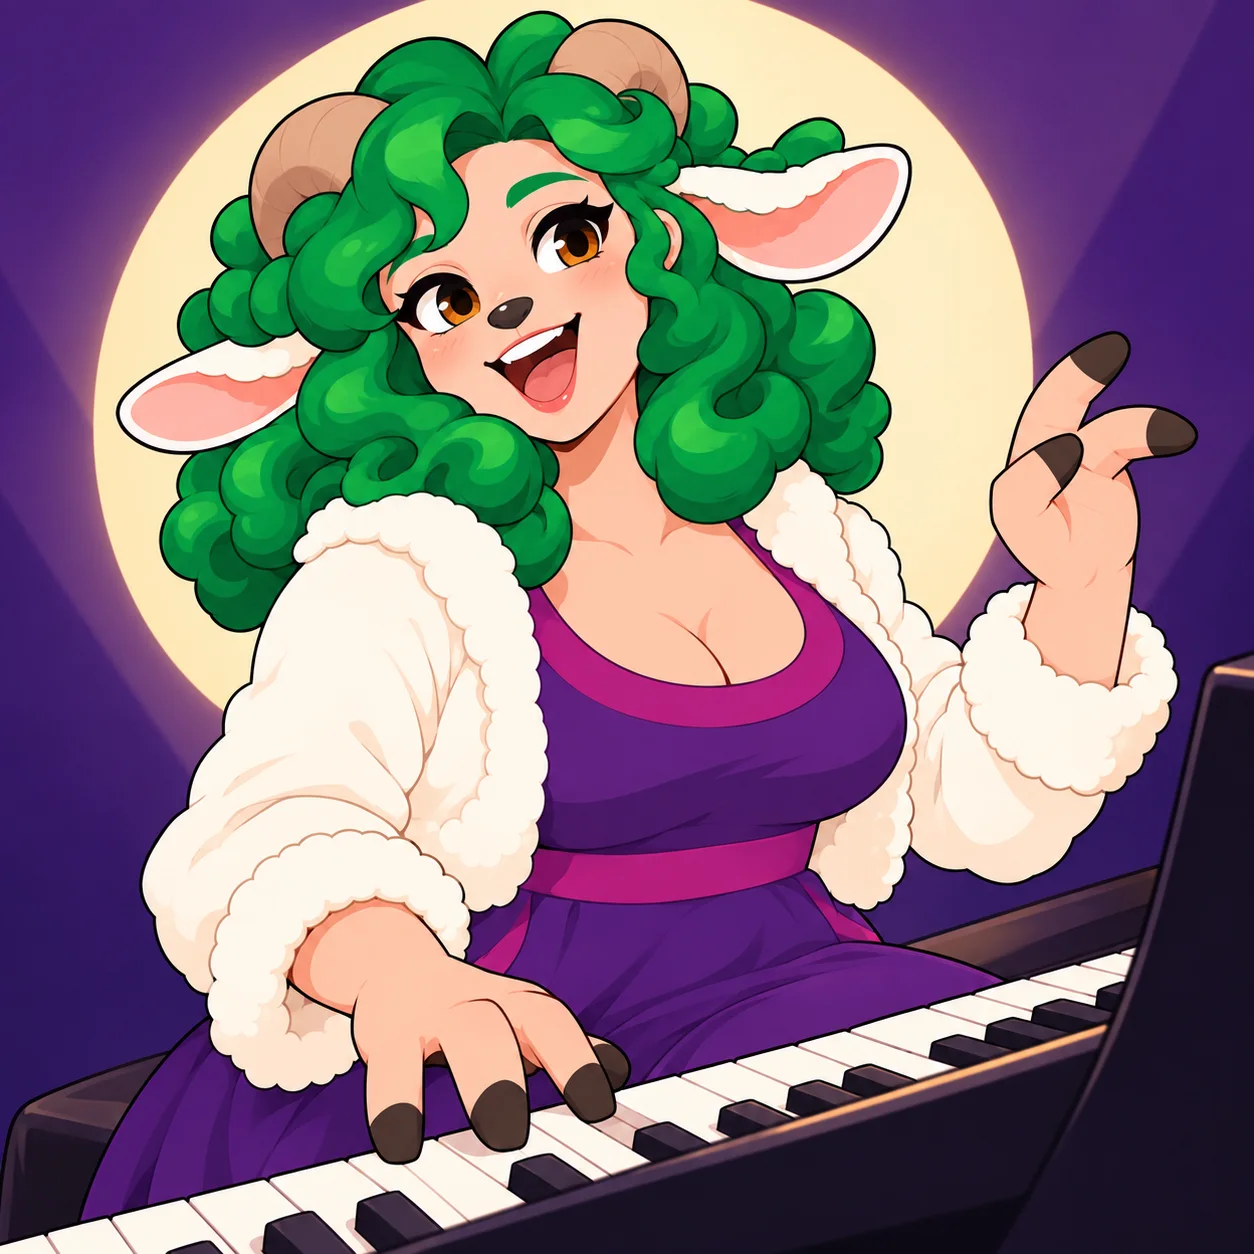
The model sheet ratcheted those choices into a continuity reference. It tested front, three-quarter, side, and back views; expressions; hands; head, ear, horn, and tail construction; and the palette. Only then did we ask for a scene: Colette singing at a piano. The scene could change the pose, camera, clothing arrangement, and light. It did not get permission to redesign Colette.
Continuity reference
Scene result
Sample scene prompt
Use Colette’s model sheet only for identity and proportions. Preserve her shoulder-length emerald curls, lamb ears, curled horns, lamb nose, softly full-bodied build, violet dress, white shearling jacket, turquoise pendant, tail, and toon-four hands.

Place her singing at a piano. Let the performance determine the pose, expression, camera, and lighting, but do not redesign her face, silhouette, species traits, or palette. After generating, compare the result with the model sheet and list what stayed consistent and what drifted.
Evidence trail
The work behind the guide
- The Fox and the Eval — why code, model, and human judgment all matter.
- Bunch, Part II: After MVP — freezing prompts, sources, settings, and output hashes so an eval does not rot.
- Bunch, Part III: The Group Photo — staging a multi-person image without inventing missing references.
- Furry Image Studio — the public prototype behind the workflow.